Oct 31, 2011

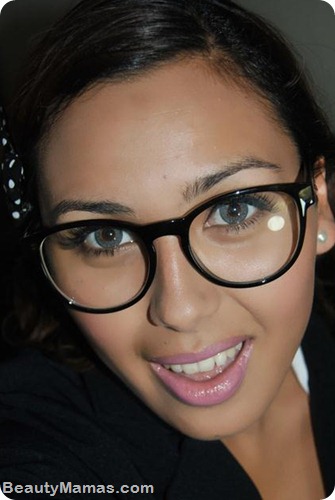
Halloween FOTD! School Girl Costume and Makeup.


Happy Halloween, Beauties! Finally got around to doing a costume post… Meant to do this over the weekend!

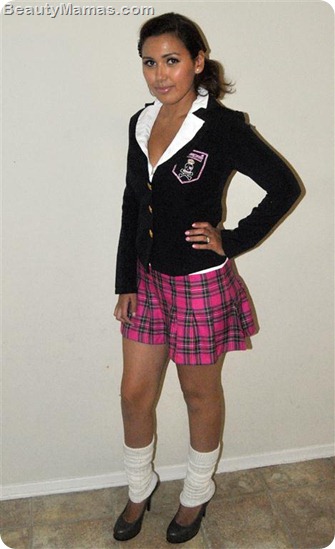
I wanted to do a cute gyaru influenced school girl costume.

Well if you have your old school uniform lying around, this could be a cute costume! I didn’t, but I got this one from Ebay (it’s a Party City one) and I think it’s really cute :) I also bought some leg warmers (also from Ebay) to give the costume some extra flair, but loose socks would look good as well (think japanese school girl style loose socks).


 DSC_1113 (Medium)


I paired it with some small pearl earrings, bow hairclips and fashion glasses from Forever 21. I love these glasses, they give off an ulzzang feel.


DSC_1171 (Medium)

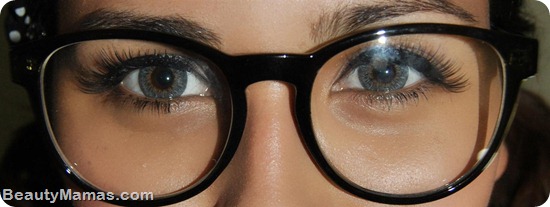
Close up of the eyes..

DSC_1182 (Medium)


Makeup is simple,

Eyes: Urban Decay neutral matte brown eyeshadow, Eyeko Graffiti liquid liner on top, Ardell false eyelashes - 105 and Dolly Wink Long mascara to open up my eyes and set off the contacts. They are my Puffy 3 Tone/Shinny Grey circle lenses.

Cheeks: soft pink blush on the apples of my cheeks for a ‘sweet’ look – I used Boots No7 Natural Blush Cheek Colour in Candy Pink.

Lips: Urban Decay lipstick in Lovechild and femme couture Super Juicies Sheer lipgloss in Light Pink for pretty, glossy pink lips. I always associate young girls with pink lipgloss.

The whole look is pretty simple, but it’s cute and has gotten lots of compliments so far! I am loving the glasses and leg warmers especially :) It would be pretty easy to put together if you’re still stuck for a costume.


Here’s some phone pics!

SAMSUNG

With Queen Bee Mai <3

386962_10150447175940873_578750872_10530824_900644347_n


I can’t wait for tonight! We’ll be having a small dinner party with friends and then going trick or treating around the neighbourhood with all the kids :) It’s always fun with good friends.

I’ll be posting up my pics from tonight of everyone’s costumes!

What are you doing for Halloween? Do you have your costume ready?

Ishah xx

Oct 25, 2011

Review: Red Carpet Manicure at-home gel system

Hey Beauties!

It’s Halloween time again… I am seeing the beauty blogs stuffed to overflowing with Halloween makeup and nail posts and I’m here to add my 2 cents :D


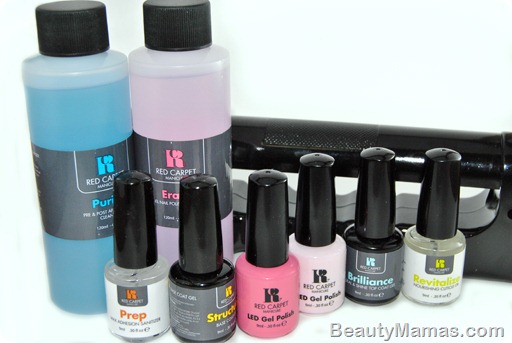
DSC_1095


I was recently sent the Red Carpet Manicure Starter kit to try and I thought it would be great to use for my Halloween manicure as it’d be long lasting (hopefully.. I’ll let you know next week!) and I have a number of different events to go to. I’ve been super excited to try out this at-home gel system, as I LOVE gel nails but don’t really want to pay to go to a salon every time I want to get them done (when my lovely friend Mai isn’t available… I don’t think she loves me any more ;_; just kidding!). I know a few nail bloggers have been DIYing gel manicures for a while now, but all those systems are really intended for professional use only and I’m far from a professional. So with the Red Carpet Manicure system being marketed as ‘at-home’ gel system, it immediately piqued my interest. Total Money Saver!


~~~~~~~~~~~~~~~~~~~~~~~~
From Red Carpet Manicure:


image


Red Carpet Manicure is the first of its kind in the retail market bringing the professional
salon experience to the masses. With 36 different shades and a portable or professional LED
light, consumers now have an affordable, easy and safe way to have beautiful gel nails
within minutes that lasts for weeks!


A full system costs $57.94, which works out $2.90 each for twenty at-­home applications compared to an average of $40.00 for each professional application in the salon. (Note: Don’t know why it says $57.94 when the starter kit is $59.99.. maybe I’m missing something? – Ishah)


Step 1: Prep
Prep Max Adhesion Sanitizer: $3.99
Step 2: Care & Color
Structure Base Coat Gel: $9.99
LED Gel Polish (36 shades): $9.99
Brilliance Seal and Shine Top Coat: $9.99
Step 3: Finish
Revitalize Nourishing Cuticle Oil: $3.99
Purify (Pre and Post Application Cleanser): $3.99
Step 4: Removal
Erase Gel Polish Remover: $3.99
Lights and Starter kits:
Pro:45 Light: $49.99
Portable LED Light: $19.99
Starter kit with professional light: $79.99
Starter kit with portable light: $59.99
Accessories kit: $3.99

Tips for application:

  • Apply thin coats
  • Cure after each coat of polish (base coat, color, brilliance top coat, etc.)
~~~~~~~~~~~~~~~~~~~~~~~~


I received the Starter kit with portable light (battery operated, whereas the pro light is plugged into the wall). It seems like a lot of steps, but if you don’t prep the nail properly, it won’t stay on as long.

First of all let me say, application is so easy.
Because the gel doesn’t dry until you cure it under the light, you have as much time in the world to apply it on the nail and correct any mistakes you might (I did) have made. I’m far from being a manicure expert, but this was extremely difficult.. to get wrong. (In other words, IT’S SUPER EASY!). Make sure you do thin coats, as if it's too thick it can run into the edge of your nail, look uneven and thick and also peels off more easily.

The first couple of times it may take a little longer than a regular manicure, but once you get more used to the differences, it’s pretty quick and painless. I did get a bit restless waiting the 2 minutes for each coat to cure, but once it’s dry, it’s hard as a rock. No smudging and having to redo your whole hand. Also, for the impatient ones, you can get the professional light which only needs 45 seconds to cure each coat. It’s a bit more expensive, but it really does cut that time down. I am seriously considering purchasing it myself, just because it’s a lot faster and I have an extremely short attention span.

One thing: since this is gel, it does not remove like regular nail polish (no matter how much it looks like nail polish in that bottle!). I made the stupid mistake of putting the Brilliance topcoat on instead of the Structure basecoat and had to remove it.. AFTER I already cured it. Took a little while, which surprised me – I guess I was still thinking in terms of regular polish. So yeah, one thing the company could do is make the topcoat and basecoat bottles a little different (for simple people like me… =_=).

EDIT: One thing to note - some of the brushes on the bottles were a bit wonky and had some hairs sticking out that made application difficult. Might just be new production issues, but I passed that info onto them anyway.

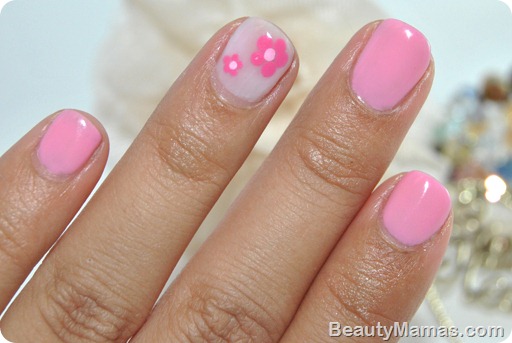
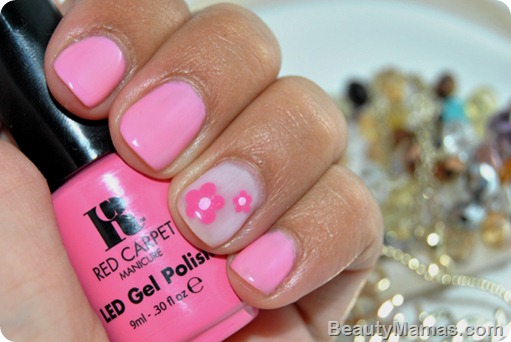
My Halloween costume this year is a school girl, so I wanted something simple and sweet looking to complement the outfit. The skirt is pink, so I used Red Carpet Manicure (RCM) After Party Playful, which is a soft, bubblegum pink. This is 2 coats.


DSC_1082


For the accent nail I used RCM Candid Moment (from their Bridal collection) as a base and then used a dotting tool and one of my Color Club unnamed pink polishes for the flowers. The dot in the centre is Konad white and red special polish mixed together…. don’t ask. I was having a hard time finding the right colour.


DSC_1056


I noticed some patchiness here and there and not sure if it’s just my newbie application… The box says only 2 coats of colour are needed, so maybe it is user error? Or maybe the lighter colours just turn out like that? Not sure, but it’s not really noticeable in real life, only on camera. I’ll have to try some of the darker colours and see if it makes a difference.


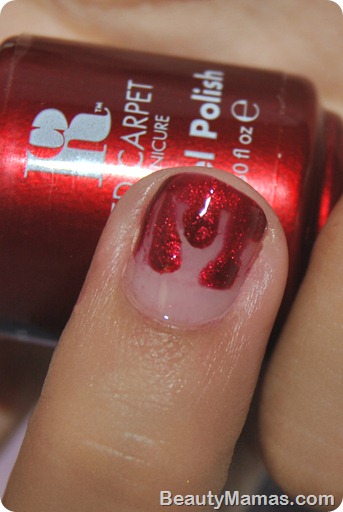
I wanted to try something a little more ‘hardcore’ Halloween, so I pulled inspiration from my favourite TV show (The Vampire Diaries) and did dripping with blood ‘Vampire’ nails. This would work a lot better with long nails, but I recently had to cut mine down ;_; As it is I think it looks pretty cool! I used RCM Candid Moment as a base and RCM Glitz & Glamorous (from their Holiday collection) for the blood drops. I think next year I’ll be Katherine (The Vampire Diaries) and have long talons dripping with glittery blood! Hey, you could still do it, I won’t be mad at you ;)


DSC_1107


Some Halloween suggestions from the red Carpet Manicure team:


  • For a spooky and trendy look, try a reverse French manicure with our “Black Stretch Limo” shade.

  • Dressing up in an 80’s themed costume this year with friends? Check out Red Carpet Manicure’s hot pink shade “Paparazzied”. 


Red Carpet Manicure products are available at ULTA who are having a 20% off sale now thru Saturday Oct 30, with free shipping on purchases over $50.

They also have a Facebook page where you can see lots of photos and posts from people that have tried the products.


I'll be doing another post on the Red Carpet Manicure system and Autumn/Winter nail trends next week, so stay tuned!

What are you dressing up as for Halloween? Are you dressing up your nails as well?

Ishah xx

Disclosure: This product was sent for review consideration by PR representative of the company. This in no way influences my opinion of the product.

Oct 21, 2011

DYING to go lighter! Feria Hi Lift Hair Colour

Ok, it’s a cheesy title. Forgive me, I haven’t posted in a while so I’m feeling frivolous.

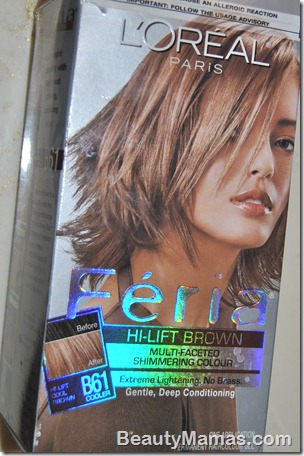
I wanted my hair to be a nice light brown for the remnants of Summer, and also needed to cover my darker brown roots, so I got this hair dye that is specifically for darker brunettes wanting to go light: Loreal Feria Hi-Lift Cool Brown 'Downtown Brown'.


DSC_0454

DSC_0460


It’s called a ‘hi lift’ colour, as it’s supposed to be a stronger formula that will lighten dark hair considerably. I was a bit worried that it would dry my hair out, but they include a nice big tube of super moisturising conditioner. It’s a creme dye, so it can drip a little if very saturated. I want to try a foam dye, since they are supposed to be completely drip-free. It wasn’t to runny though and didn’t have an overpowering smell. I tend to be sensitive to dyes and this one wasn’t too harsh.

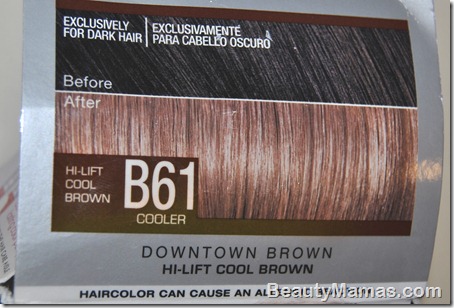
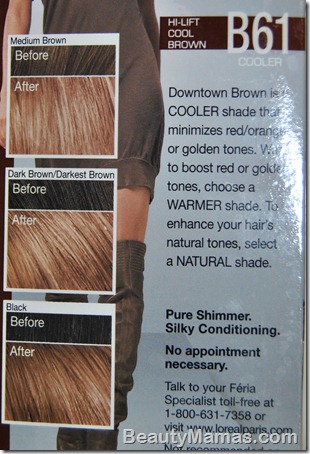
The instructions say to leave it in up to 35 minutes, but I left it in a bit longer because it didn’t seem to be lightening up all that much. I’m glad I did, because even with the extra time it didn’t get quite as light as the shade guide promised. My hair was a medium to dark brown shade and dark brown at the roots, but the result is a bit darker than the ‘black hair’ shade.


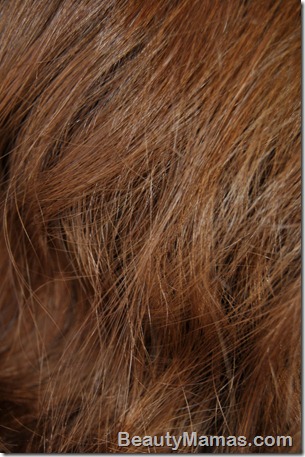
L: Shade guide                                               R: How it turned out on my hair
DSC_0466DSC_0749


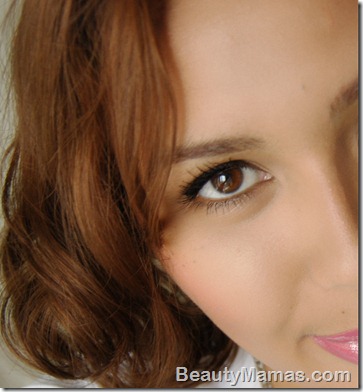
Although it’s supposed to be a ‘cool’ brown, it still turned out a bit more orangey than the dye’s example pictures. It isn’t a bad result though, it’s more like a gyaru orange brown. My hair tends to go reddish every time I lighten it, so I expected a bit of warm tone to show through. It’s ‘multifaceted’ so the colour isn’t flat, but rather picks up highlights/lowlights in your hair and gives it a bit of depth. My roots are very slightly darker than the lengths, I probably should have left it on longer on the roots before doing the rest of my hair. It’s not really noticable in real life, but shows up on camera in certain lighting.


DSC_0517


As far as at home ‘box dyes’ this one is pretty good. It didn’t lighten it as much as I wanted it to, but it’s a nice colour, it wasn’t patchy and didn’t leave stains on my hairline. I used most of the dye to fully saturate my shoulder length hair, so if you have long hair I’d recommend buying two boxes.

Now that Autumn is here, I’m thinking of dying my hair a medium plum brown colour…. what do you think?

Do you change your hair colour depending on the season?

Ishah xx

Oct 17, 2011

Manicure Monday: Layering with ORLY


Hello, my Beauties!

It’s been too long since I’ve posted.. I am definitely getting back into the swing of things though and I have HEAPS of stuff to review :) Today I have some ORLY nail products.

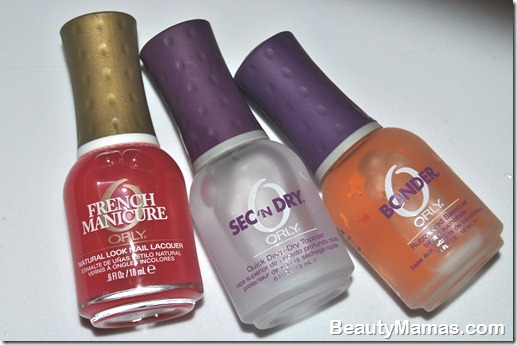
Now, my first impression of ORLY Sec n Dry topcoat wasn’t a good one; it dried super fast, but it also shrank and peeled and generally sucked as a topcoat. After some trial and error, I discovered it works beautifully when combined with ORLY Bonder base coat and a good wrapping technique on the tips. It lasts me a good week - week and a half without chipping or peeling.


DSC_0431


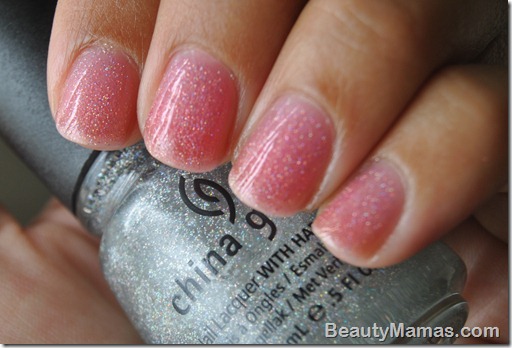
I also picked up ORLY Bare Rose from their French Manicure collection. It’s a sheer rosy pink that looks really pretty by itself and even better layered over glitters. For this mani, I layered 1 coat of Bonder, 1 coat of Bare Rose, 1 coat of China Glaze Fairy Dust, another 2 coats of Bare Rose and 1 coat of Sec n Dry.


DSC_0183


I love the soft, glittery effect; it looks like fairy floss (cotton candy) with sparkles :) It’s subtle, but in the sunlight Fairy Dust really lights up and looks amazing. The layering gives it a sparkly jelly look. This is definitely one of my favourite simple manis that I can see myself wearing on a regular basis.

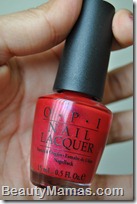
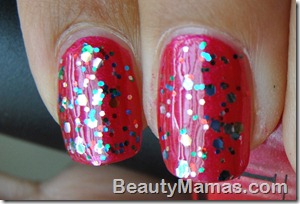
Here’s another combo: 1 coat Bonder, 1 coat OPI Met on the Internet, 1 coat Milani Gems, 2 coats Bare Rose, 1 coat Sec n Dry.


DSC_0421DSC_0415


I liked this one, but not as much as the first combo with Fairy Dust. This one was more noticable and Gems definitely gave a jewel-like sparkle to my nails. I think this would be a good Christmas mani, the colours were like ornaments and tinsel! The layering made it look like the glitter was suspended in a sheer pink polish and really smoothed it out and made it look flawless. I’m definitely going to be using Bare Rose a lot with my glitters! Usually I hesitate to use Gems as it can be a pain to take off, but I found that removal was a bit better because the glitter was encased in layers of nail polish and came off quite easily.

Do you like to layer sheer polish over glitters? I want to try a ‘candy mani’!

Look forward to lots of posts from me :) I am back with a vengeance and will endeavour to post frequently!

Ishah xx
Related Posts Plugin for WordPress, Blogger...